
STEP 01
The Generate tab
Open Environments, then The Lamp Room, and click its Generate tab. Whatever you make here lands in The Lamp Room.
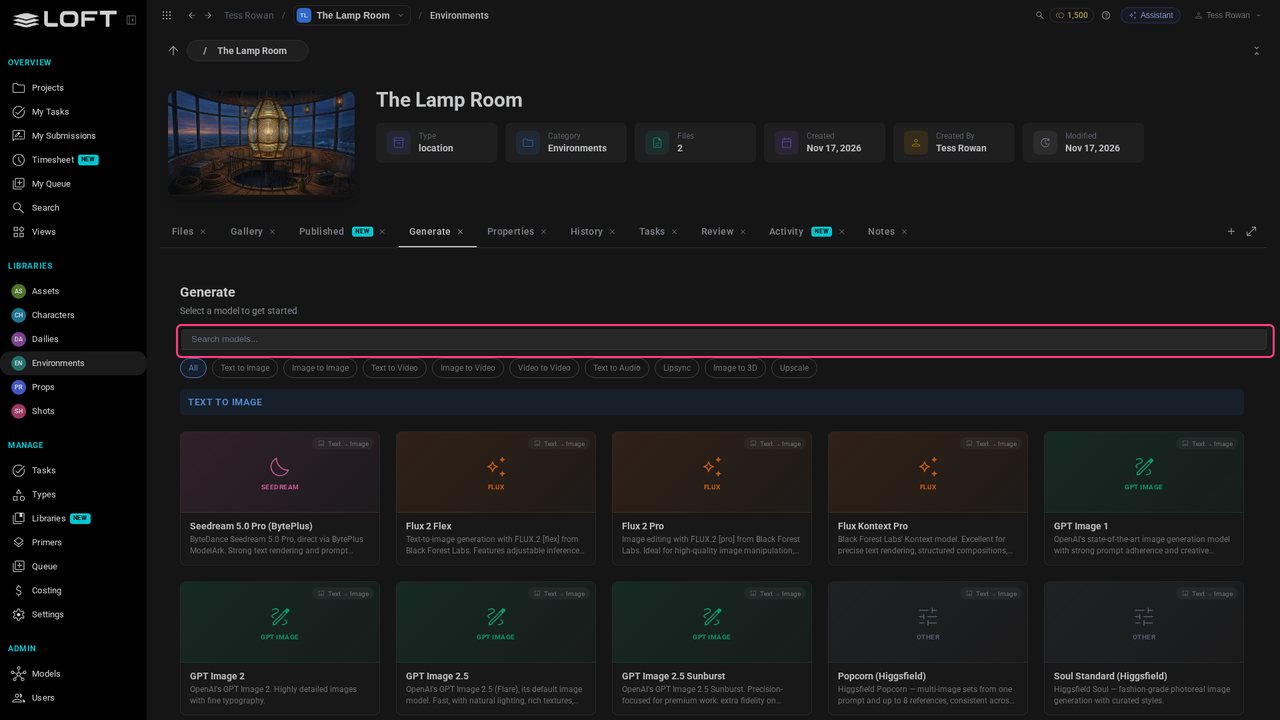
Learn/Get started
The Assistant chooses the model, the images and the settings for you. The Generate tab is the same thing with every choice yours: here's how to use it.
Follow along
Open Environments, then The Lamp Room, and click its Generate tab. Whatever you make here lands in The Lamp Room.
The gallery holds every model your organization offers. Narrow it by what goes in and what comes out: you're starting from images, so Image to Image.
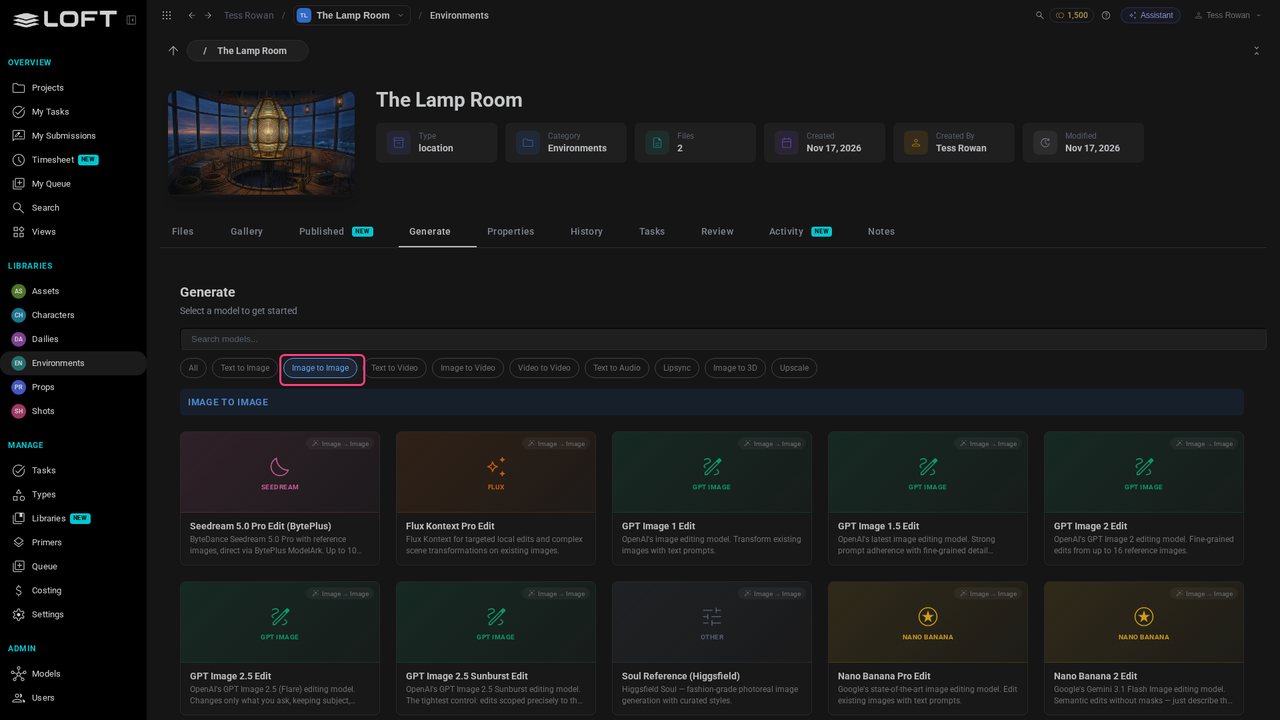
Each card says what the model is good at. Click Nano Banana Pro Edit: it edits images you give it and keeps what you tell it to keep.
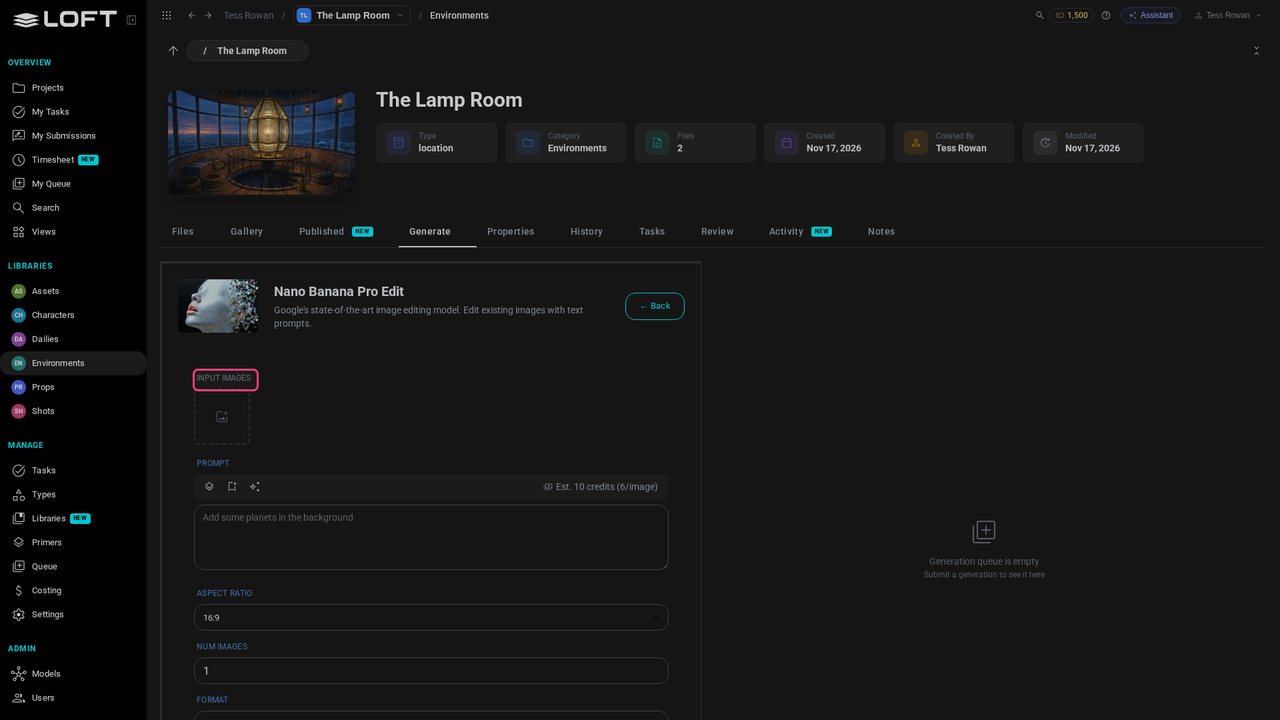
Click the Input Images box. It opens on this asset's files: its published design, and the colour key you marked Reference. Both are offered because both are inputs.
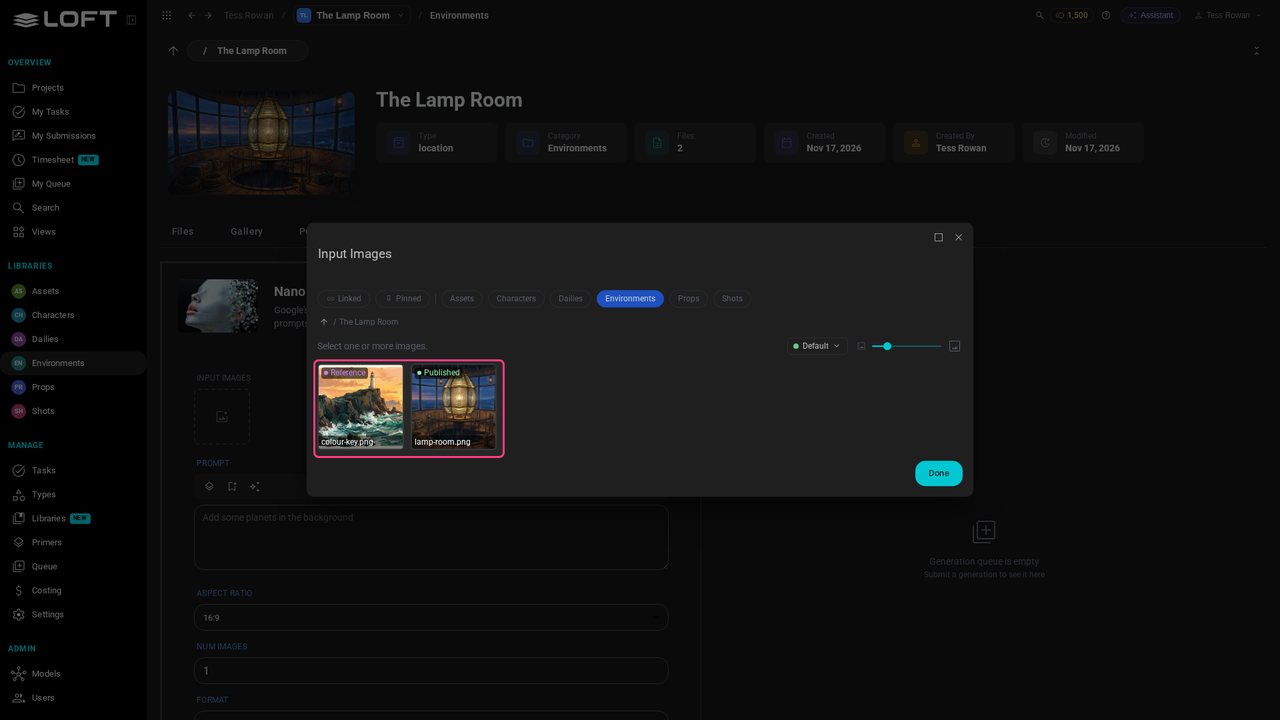
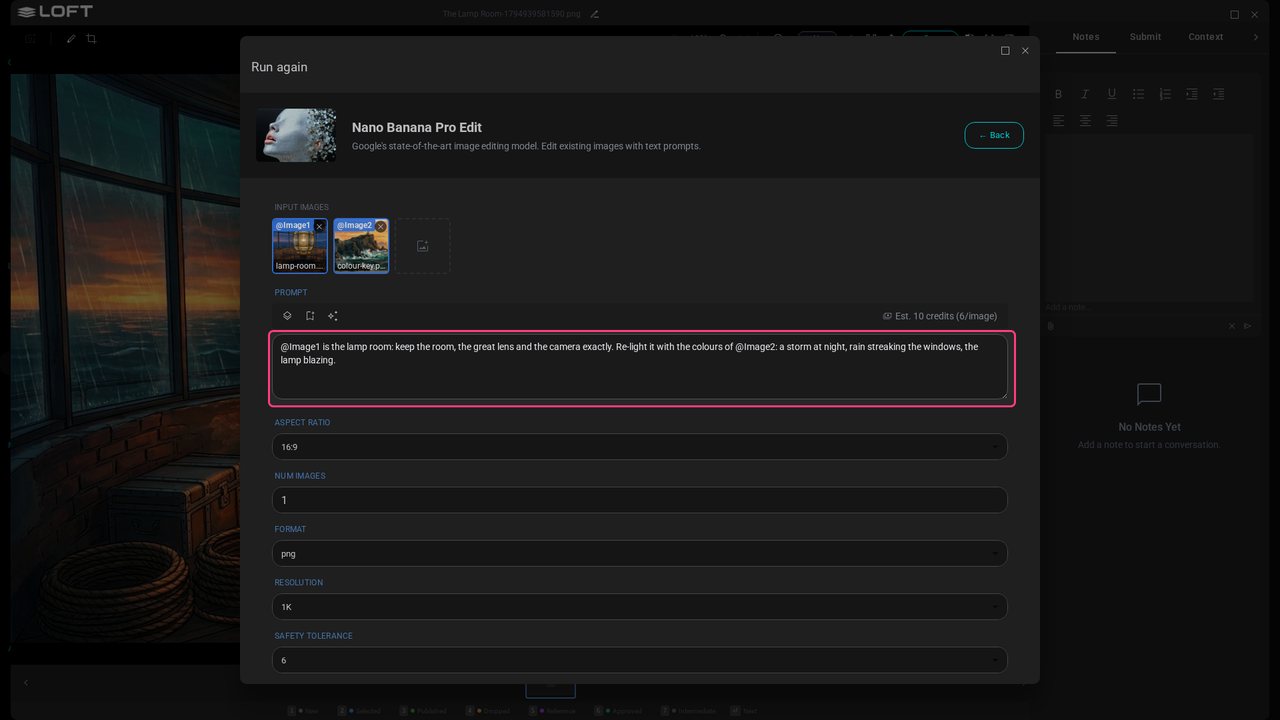
Click lamp-room.png, then colour-key.png. The order matters: the first is Image 1 in your prompt, the second Image 2.
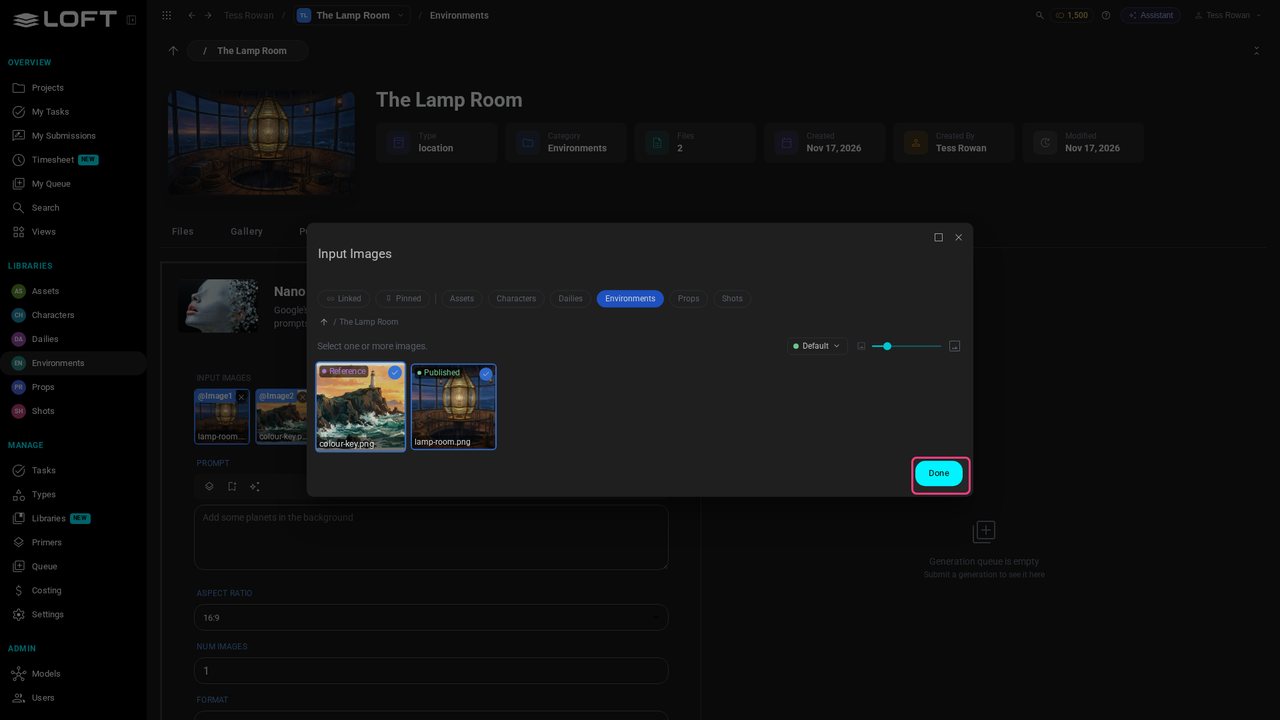
Click Done and write the prompt, naming each image by its number: what to keep from Image 1, what to take from Image 2.
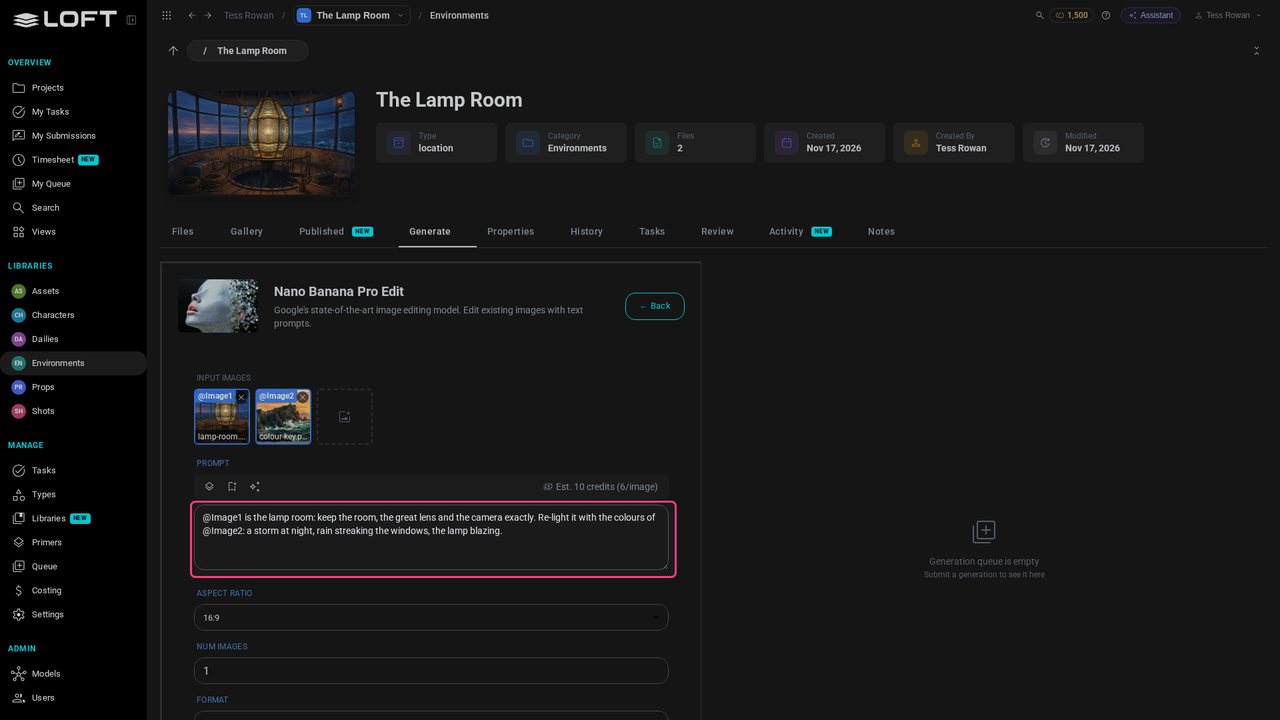
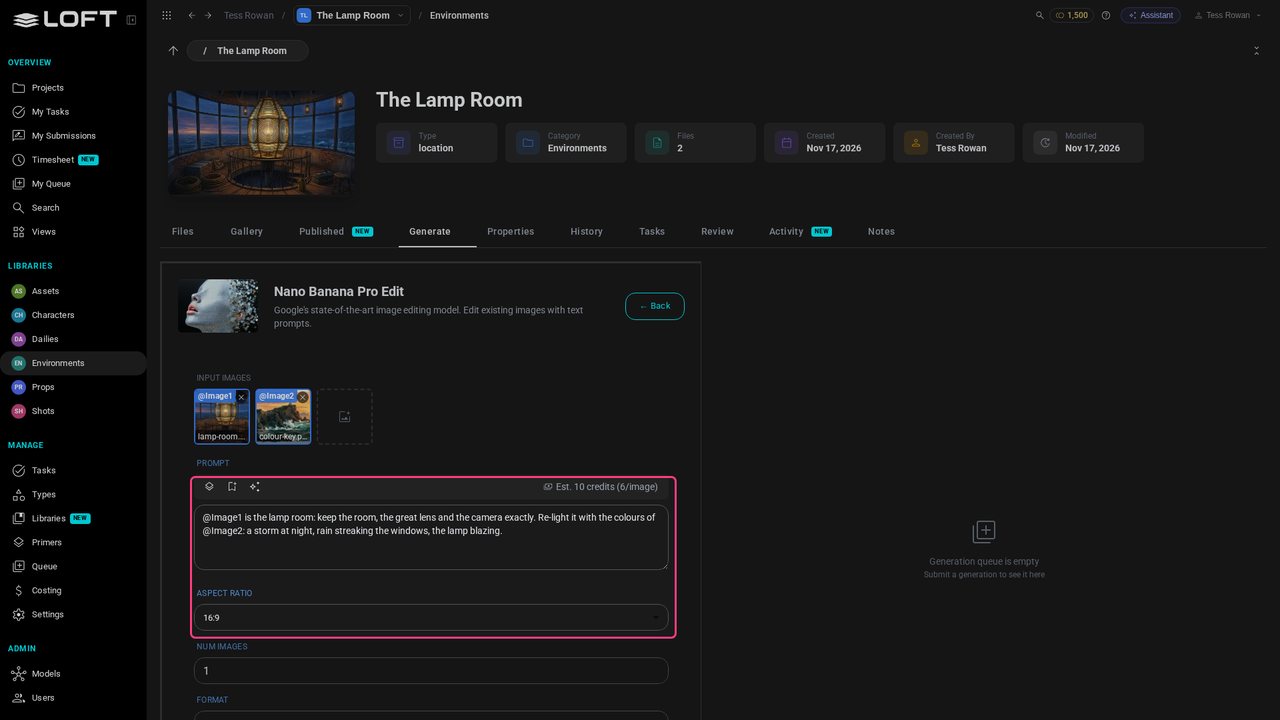
Below are the model's own settings, the aspect ratio first. The estimate above the prompt says what this costs before you spend anything.
Click Generate. The job goes into the queue on the right, and the image lands there and in The Lamp Room's files. Yours will look different from this one.
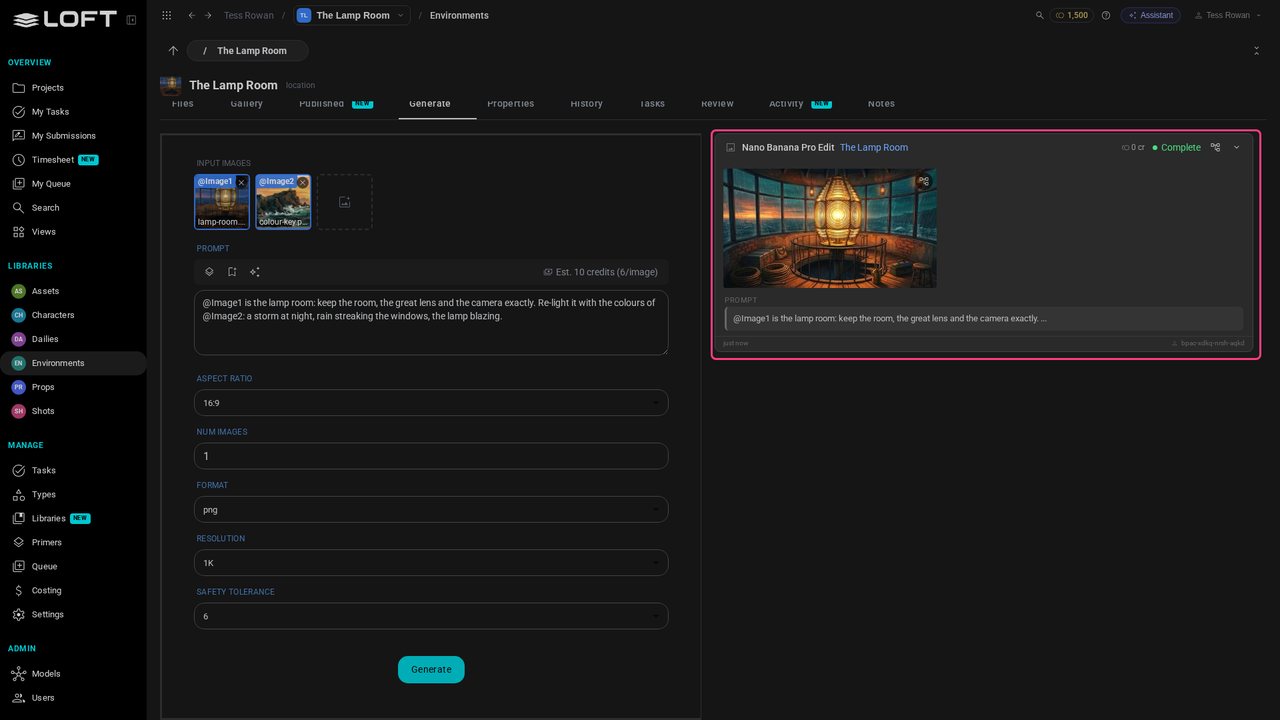
Click the image on the queue card to open it full size. It's in The Lamp Room's files, marked New.
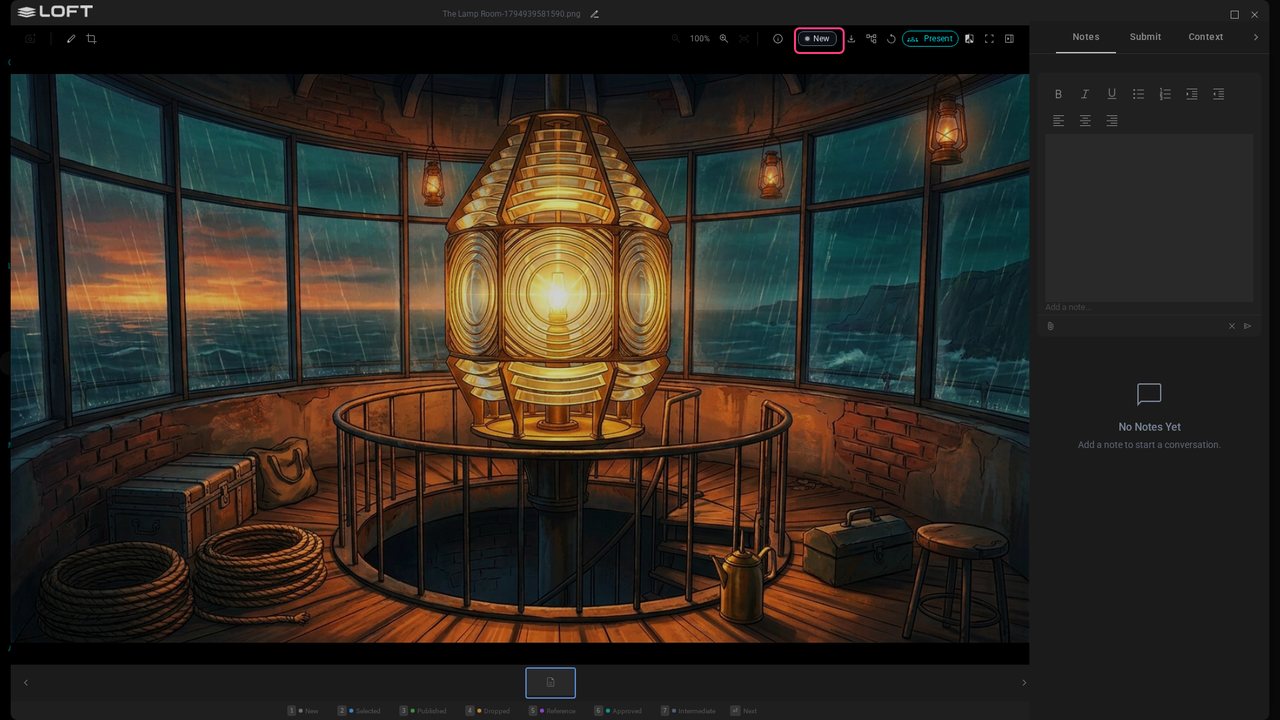
Want to change one thing? Run again, above the image, brings back the form with everything that made it: model, images, prompt, settings. Change what you want, then Generate.
Up next in Get started
Make a shot, tell it who and where it is, make its keyframe by hand, and ask the Assistant to animate it. Follow along in your own project.
In the playlists Get started.